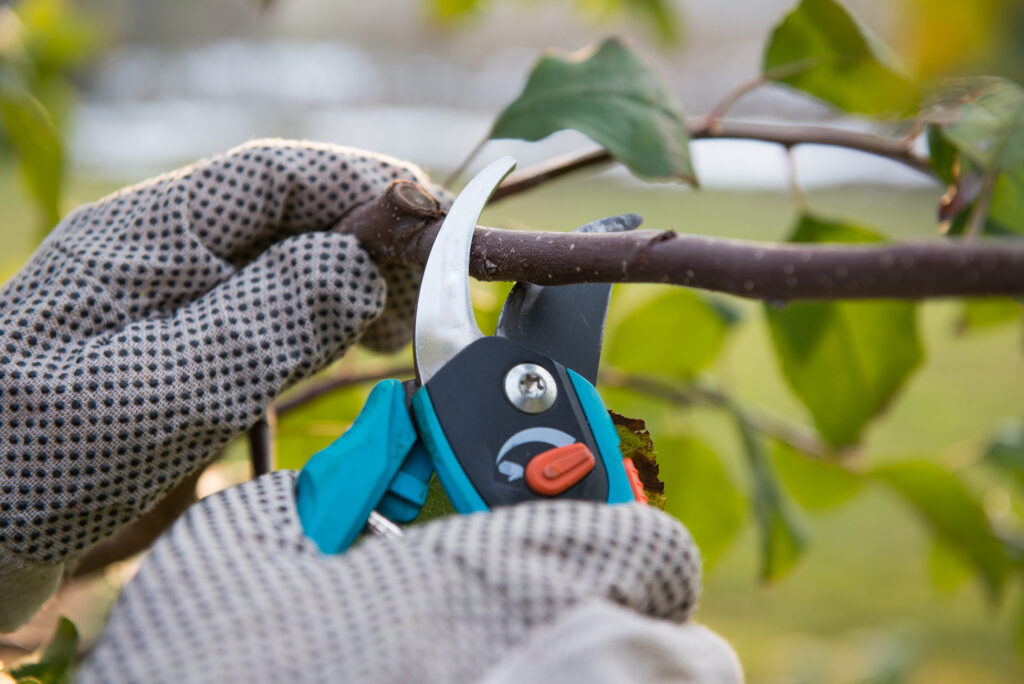
Pruning tools contact sap, bark, and freshly cut plant tissue, giving some disease-causing organisms a way to move between plants. Disinfection can reduce that risk, but its usefulness depends on the disease, the product, and how carefully you use it.
Clean and disinfect tools after contact with known or suspected diseased material, before using them on healthy plants. Whether treatment is needed between individual cuts depends on the plant disease and its pruning recommendations. An effective routine combines debris removal, an appropriate disinfectant, sufficient contact time, and care that protects the tool afterward.
🧼 Cleaning and Disinfecting Do Different Jobs
Cleaning removes soil, sap, and plant fragments. Disinfecting treats the cleaned surface to reduce or inactivate susceptible microorganisms. A blade that looks clean may still carry pathogens, while a dirty blade can protect them from the disinfectant.
Begin with cleaning whenever you disinfect. Remove deposits from both cutting surfaces and accessible crevices before applying the chosen treatment. Ordinary washing, sharpening, and rust removal are useful maintenance tasks, but each serves a different purpose from disinfection.
For blades with corrosion, our guide to removing rust from garden tools explains how to prepare the metal without unnecessarily damaging its finish.
🌿 When Is Disinfection Necessary?
Give disinfection particular attention when pruning out diseased growth or moving from a suspect plant to a healthy one. Tools used in another garden should also be cleaned and disinfected before returning to your own plants. Propagation work may require a stricter routine because contaminated tools can transfer pathogens to new plant material.
Use the situation to plan your approach:
| Situation | Practical approach |
|---|---|
| Routine pruning of apparently healthy plants | Keep tools clean and maintained; there is no universal requirement to disinfect after every cut |
| Cutting known or suspected infected tissue | Clean and disinfect before returning to healthy material; follow disease-specific advice about treatment between cuts |
| Taking cuttings or grafting | Follow the crop’s propagation hygiene protocol and use healthy source plants |
| Borrowed tools or tools used in another garden | Clean and disinfect before using them in your garden |
| Seasonal storage | Include cleaning and appropriate disinfection in the maintenance routine |
Not all plant diseases spread readily on pruning tools. Disease-specific advice matters because the organism, the location of the cut, and the pruning method can change the recommendation. A brown leaf or dead twig alone does not identify the cause of a problem.
🧴 Which Disinfectant Should You Use?
Choose a method supported for the plant-health problem you are managing and compatible with the tool. For a commercial disinfectant, check its directions for the intended use, surface, dilution, and contact time. A household product’s claims against human germs do not establish effectiveness against every plant pathogen.
| Option | Where it may fit | Main limitation |
|---|---|---|
| 70% isopropyl alcohol | Routine treatment of compatible small metal tools when appropriate for the pathogen | Flammable; does not reliably control every plant pathogen |
| Commercial tool disinfectant or a supported formulation | Situations covered by its directions and relevant disease guidance | Formulations, dilution rates, and contact times vary |
| Household chlorine bleach solution | Disease-management protocols that specifically recommend it | Corrodes metal and requires careful handling and aftercare |
Ready-to-use 70% isopropyl alcohol is a convenient option for many routine pruning-tool tasks. University of Wisconsin Extension recommends at least 30 seconds of treatment with 70% alcohol. Keep the cleaned working surfaces wet for that period, following any longer applicable instructions.
Use liquid products suited to the task rather than assuming hand sanitizer gel or an arbitrary household spray is interchangeable. Check compatibility with blade coatings, painted surfaces, plastic components, and grips.
🪣 Using Bleach Requires Extra Care
Bleach can be useful in a recommended disease-control protocol, but it can pit and corrode cutting tools. One common extension dilution is one part household chlorine bleach to nine parts water. This makes a 10% dilution of the bleach product; it does not mean 10% active chlorine. Check the bleach strength and use directions against the protocol you intend to follow.
Contact times must match the method. Iowa State’s pruning-tool guidance specifies at least 10 minutes for its bleach treatment, followed by rinsing with clean water. Do not transfer the short alcohol treatment time to a different disinfectant.
Prepare solutions as directed, observe their usable life, and protect skin, eyes, and clothing. Never mix bleach with alcohol, vinegar, ammonia, or other cleaning products. Keep disinfectant solutions out of garden soil and follow the product’s disposal instructions.
✂️ How to Disinfect Pruning Tools Step by Step
This procedure applies to manual tools such as hand pruners, loppers, and suitable pruning saws. Powered equipment needs its own maintenance instructions, especially around batteries, motors, and electrical parts.
1. Prepare the Products and Work Area
Choose the treatment before beginning so you know its contact time and any rinsing requirements. Have a brush, suitable cleaner, clean water, and clean cloths available. Wear the protective equipment specified by the product and work with appropriate ventilation.
Keep alcohol away from flames, sparks, and other ignition sources. Arrange a separate place for cleaned tools so they do not immediately touch dirty blades, plant debris, or used cleaning cloths.
2. Remove Sap, Soil, and Plant Debris
Brush or wipe away loose material, then clean stubborn deposits using the tool manufacturer’s recommended method. Mild detergent and water may be suitable; hardened sap may need a compatible cleaner. Remove cleaning residues before applying the disinfectant.
Clean the cutting blade and the opposing surface that contacts plant material. Pay attention to accessible joints and grooves without dismantling parts that are not intended for user maintenance. Avoid immersing wooden handles or other components unless the method is approved for them.
3. Apply the Disinfectant and Allow Contact Time
Wet the cleaned working surfaces thoroughly using the application method specified for the product. Depending on the instructions, this may involve dipping, spraying, or wiping with enough liquid to cover the required area.
Contact time is the period the surface must remain wet for the treatment to work. A quick swipe followed immediately by drying may not provide it. If the surface dries early, follow the directions for reapplication so the full wet contact time is achieved.
For repeated work, two sets of pruners can make the routine easier: one completes its treatment while you use the other. Each tool still needs cleaning and the full required treatment before it returns to use.
4. Complete Any Rinsing and Drying Requirements
Rinse when the product or disease-control protocol requires it, after the contact time is complete. Other products specify air-drying. Follow the chosen method instead of automatically wiping every disinfectant off immediately.
Use clean water and clean materials for aftercare. A dirty cloth can recontaminate a freshly treated blade. Let joints and crevices dry as well as the visible cutting surfaces.
5. Protect the Tool After the Job
At the end of the pruning session, dry the tool thoroughly and lubricate designated moving parts according to its instructions. Apply a light protective coating to exposed metal where recommended, then wipe away excess oil.
Check that the blades move smoothly and the safety catch works. Store the tool somewhere dry. For a fuller seasonal routine, see How to Clean Garden Tools Before Storing Them for Winter.
🍎 Why Fire Blight Needs Specific Advice
Fire blight illustrates why a general alcohol recommendation has limits. Iowa State advises against relying on alcohol to disinfect pruning tools used on apple trees infected with fire blight and recommends a bleach treatment instead.
The need for treatment between cuts also depends on the pruning situation. Extension guidance considers whether blades contact infected tissue and whether cuts are made sufficiently far into healthy wood. Consult current local guidance for the affected plant before choosing a method or pruning strategy.
Disinfecting the blade cannot compensate for leaving infected tissue in place. Tool hygiene belongs alongside correct pruning, diagnosis, and management of the diseased material.
🌱 Be Especially Careful When Taking Cuttings
Some plant viruses and viroids spread through sap, physical contact, or propagation tools. When taking cuttings or grafting, follow the crop-specific guidance for cleaning tools between source plants or more frequently where required. Keep the work surface and other equipment clean, too.
Start with healthy planting stock. Disinfecting a knife or pair of snips reduces opportunities for transfer; it does not turn an infected cutting into healthy material. A nursery or extension service can help you choose an appropriate protocol when a particular disease is suspected.
🛠️ Keep Disinfection Part of Overall Tool Care
Effective tool care combines cleanliness, suitable disinfection, a sound cutting edge, and correct adjustment. If pruning shears crush stems or require excessive force, check for sap buildup, dullness, or mechanical problems. Our guide to sharpening pruning shears covers that separate maintenance task.
Before starting a pruning job, decide which plants need attention, whether disease is involved, and how you will clean and treat the tools. Having the supplies ready makes it easier to complete the necessary steps without rushing the contact time.
🔗 Related Articles
- How to Sharpen Pruning Shears
- How to Remove Rust From Garden Tools
- How to Clean Garden Tools Before Storing Them for Winter
- Garden Tools & Products
📚 Sources & Further Reading
- Clean and Disinfect Gardening Tools and Containers — University of Minnesota Extension
- How Do I Sanitize My Pruning Shears? — Iowa State University Extension
- Pruning Woody Landscape Plants — Washington State University
- Maintaining Lawn and Garden Tools — University of Wisconsin Extension
- Disinfectant Labels and Contact Times — U.S. Environmental Protection Agency
- Viruses and Viroid Diseases — University of California Integrated Pest Management
- Fire Blight — University of Minnesota Extension
- Cleaning Hand Tools — Royal Horticultural Society