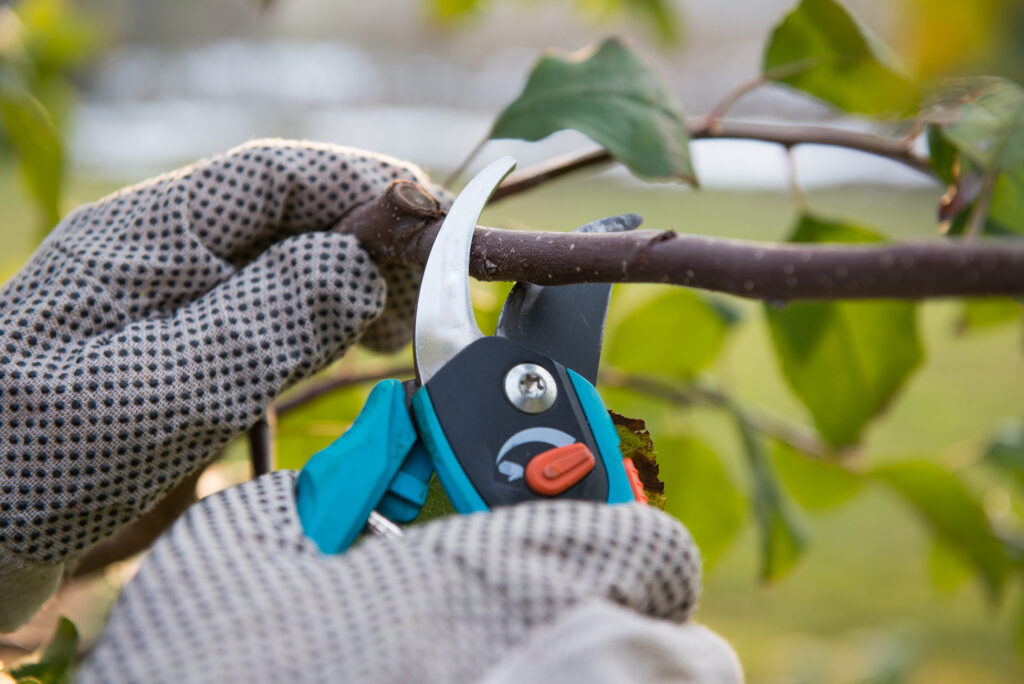
Sharp pruning shears make garden work easier and help you cut stems cleanly. When the blades become dull, you may notice extra resistance, ragged cuts, or stems getting pinched instead of sliced. Cleaning and checking the mechanism first can reveal whether the problem is the edge, sticky sap, or an adjustment that needs attention.
To sharpen most manual bypass pruning shears, clean the blade, secure the tool, and use a suitable hand sharpener to follow the existing bevel. Remove the small burr from the flat side with a very light pass, then clean, lubricate, and test the shears.
The details depend on the blade design. Identify your tool before starting, and follow its manufacturer’s instructions where they differ from a general method.
✂️ Identify Your Type of Pruning Shears
Bypass pruners have a cutting blade that slides past a supporting hook or counter-blade. The cutting blade usually has a beveled outer side and a flat inner side. Routine sharpening restores that existing bevel; it does not turn the supporting hook into another sharp blade.
Anvil pruners have a cutting blade that closes against a flat support. Many have a cutting edge beveled on both sides, so the sharpening method differs. Fine pruning snips and scissors can have two cutting blades and need their own instructions.
| Tool type | What to identify before sharpening |
|---|---|
| Bypass pruners | The cutting blade’s beveled side and flat reverse side |
| Anvil pruners | The blade’s specified bevels and its contact with the anvil |
| Pruning snips or scissors | The sharpening instructions for each cutting blade |
The walkthrough below focuses on ordinary manual bypass pruners. Powered pruners and specialty blades require their own maintenance procedures.
🧰 Gather the Right Sharpening Supplies
A small diamond hand sharpener or a suitable sharpening stone is practical for many pruning shears. Choose a shape that reaches the curved cutting edge without striking the handles or supporting blade. Hardened and hollow-ground blades may need particular abrasives, so do not assume an ordinary metal file is suitable.
Wear protective gloves and eye protection while you work, and keep these supplies nearby:
- A manufacturer-approved sharpener or stone
- A brush, clean cloths, and suitable blade cleaner
- Protective gloves and eye protection
- A vise or clamp appropriate for securing the tool
- A marker pen, if you want help checking the bevel
- Suitable lubricating oil
- The correct tools for any permitted disassembly
Check whether your sharpening stone should be used dry, with water, or with oil. Follow its instructions rather than adding lubricant automatically.
🧼 1. Clean and Inspect the Blades
Remove dirt, dried sap, and other deposits before sharpening. Use the tool manufacturer’s recommended cleaner, wipe away loosened residue, and dry the blade. A clean surface lets you see the edge clearly and keeps sticky material off the sharpener.
Deal with corrosion before working on the cutting edge. Our guide to removing rust from garden tools explains how to approach light rust, heavier buildup, and coated surfaces.
Inspect the blade for cracks, large chips, bending, or deep corrosion. Check the spring, pivot, and handles as well. Set aside tools with serious damage for repair or replacement; sharpening cannot correct a bent blade or restore metal lost to corrosion.
🔒 2. Secure the Tool and Expose the Cutting Edge
You do not need to dismantle every pair of pruners for a routine touch-up. Some models can be sharpened while assembled, provided you can reach the bevel and hold the tool securely. Others allow blade removal for more thorough maintenance.
If disassembly is permitted and necessary, follow the manual and keep springs, washers, and fasteners together. A photograph before taking the tool apart can help with reassembly. Do not force a riveted or sealed mechanism apart.
Secure the tool or removed blade so it cannot shift during sharpening. Use the recommended clamping position and avoid excessive pressure that could bend a component. Keep the edge directed away from your body and your supporting hand clear of the sharpener’s path.
📐 3. Find and Match the Existing Bevel
Look closely at the cutting blade. The bevel is the narrow, sloping surface that leads down to the sharp edge. On a typical bypass blade, the opposite face is comparatively flat and passes closely against the counter-blade.
Place the sharpener’s abrasive surface against that existing slope. Adjust its position until it sits flush with the bevel, then maintain that contact as you work. Follow the manufacturer’s specified angle when one is provided; a single angle does not suit every pruning tool.
A marker can make the contact easier to see. Color the bevel lightly, make a gentle sharpening pass, and inspect where the ink has been removed. Aim for even contact across the existing bevel instead of repeatedly polishing only its shoulder or rounding over the cutting edge.
🪨 4. Sharpen With Controlled Strokes
Using your chosen hand sharpener, make smooth, controlled strokes along the beveled cutting surface, working away from your body. For a small diamond sharpener, follow the curve of the blade from the heel near the pivot toward the tip, as the tool’s instructions allow.
Apply light, even pressure and keep the angle consistent. Lift or reset the sharpener between strokes rather than rapidly sawing back and forth. Work across the usable edge so you do not create an uneven patch.
Pause after a few strokes to inspect your progress. Remove only enough metal to restore the edge; the number of passes depends on the blade’s condition and the abrasive. If using a suitable two-sided sharpener, follow its directions for moving to the finer surface to finish.
Preserve the blade’s original shape and avoid grinding away its protective coating beyond the intended sharpening area.
🔍 5. Remove the Burr Without Beveling the Flat Side
Sharpening can leave a tiny ridge of metal, called a burr, on the reverse side of the cutting edge. Removing it helps the blade pass smoothly against its supporting surface.
For an ordinary single-bevel bypass blade, place a fine abrasive flat against the reverse face and make a very light pass along the edge, following the manufacturer’s method. Keep the abrasive flat: this is a small finishing step, not a second round of edge shaping.
Avoid tilting the sharpener upward and creating a new bevel on that flat side. Doing so changes the way the blade meets the counter-blade. Keep fingers clear of the edge while inspecting it, and avoid repeatedly rubbing the reverse face once the burr has been removed.
🛢️ 6. Clean, Lubricate, and Reassemble
Wipe away sharpening debris before returning the tool to use. If the shears need disinfection because they contacted diseased plants, use an appropriate method after cleaning. Follow the disinfectant’s contact time, material-compatibility, and rinsing instructions, then let the tool dry thoroughly.
Lubricate the pivot, spring, and other specified moving parts with a suitable product. Apply a light protective coating to exposed metal where recommended, and wipe away excess oil so it does not collect grime or make the grips slippery.
Reassemble any removed components in their correct positions. Adjust blade tension according to the manual: the cutting blade should pass the counter-blade smoothly, without excessive side-to-side play or binding. Check that the safety catch works properly.
🌿 7. Test the Shears on Suitable Material
Make a controlled test cut on a healthy stem comfortably within the tool’s cutting capacity. For bypass pruners, a small green stem is a useful test. Keep your supporting hand well away from the cutting line and check whether the tool cuts smoothly with reasonable pressure.
Inspect the result for tearing, folding, or crushing. If performance is still poor, check for remaining sap, incorrect blade tension, or misalignment before removing more metal. A stiff pivot can make a sharp tool feel difficult to use.
Stop if the blade catches against its supporting part or the mechanism behaves abnormally. Resolve the mechanical problem before continuing to prune.
🗓️ How Often Should You Sharpen Pruning Shears?
Use cutting performance as your guide. Frequent pruning may call for small touch-ups during the season, while occasional light use may require less attention. Clean the tool first whenever cutting becomes harder, then assess the edge.
A fuller inspection fits naturally into seasonal maintenance. Our guide to cleaning garden tools before storing them for winter covers cleaning, handle care, lubrication, and protected storage.
Regular light maintenance can reduce the need for more extensive sharpening later. After use, remove sap and moisture, protect metal as recommended, and store the shears somewhere dry.
🛠️ When Is Repair or Replacement Better?
Professional servicing or a replacement blade may be the better choice when the edge has large chips, the blade is bent, corrosion is severe, or repeated sharpening has substantially changed its shape. Deep damage takes more skill to correct while preserving the blade’s geometry.
Look up the model before replacing the entire tool. Some pruning shears have replaceable blades, springs, and adjustment components. If the tool no longer aligns or locks properly, address those problems alongside the cutting edge so it is ready for dependable use.
🔗 Related Articles
- How to Remove Rust From Garden Tools
- How to Clean Garden Tools Before Storing Them for Winter
- Garden Tools & Products
- How to Prepare Your Garden for Winter
📚 Sources & Further Reading
- Sharpening Hand Tools — Royal Horticultural Society
- How to Sharpen and Maintain Pruning Tools — FELCO
- Sharpening Garden Tools — Oregon State University Extension and Oregon Master Gardener Association
- Sharpening Instructions for CB-8Z and CB-9Z Pruners — ARS
- Understanding Bypass and Anvil Hand Pruners — Corona Tools
- Cleaning Hand Tools — Royal Horticultural Society
- Clean and Disinfect Gardening Tools and Containers — University of Minnesota Extension