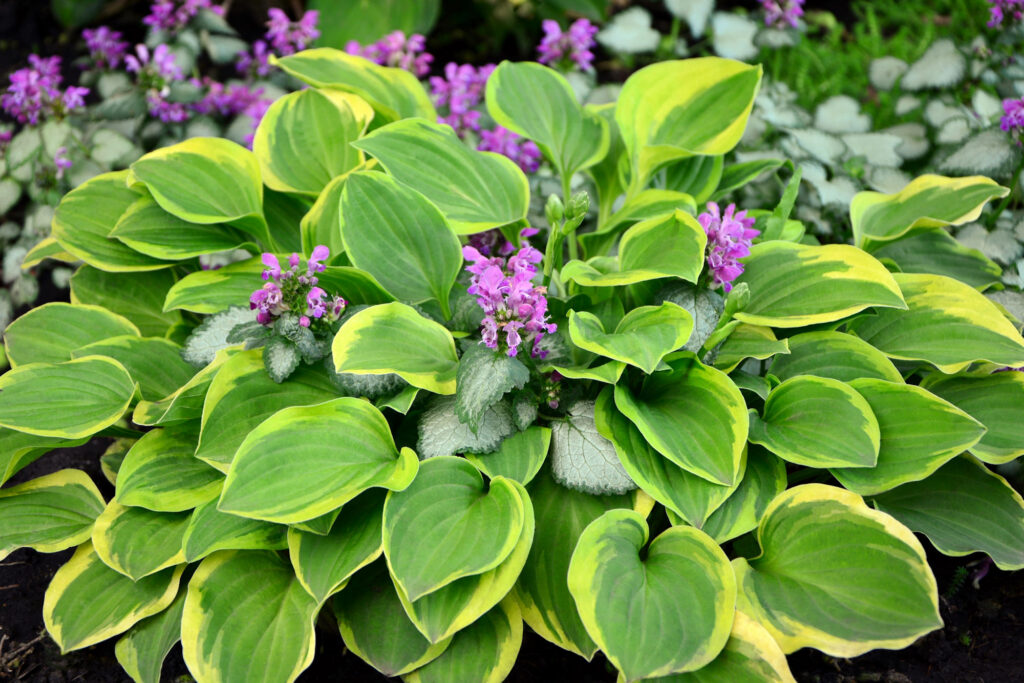
Hostas are among the most dependable plants for shady gardens. Their lush foliage, attractive colors, and graceful mounding growth make them wonderful additions to flower beds, woodland gardens, and borders.
Over time, however, a small hosta can develop into an impressive clump that takes up considerably more space than it once did.
If your hostas have become overcrowded, are spreading into neighboring plants, or simply need to be moved, dividing them is an easy way to create additional plants without spending any money.
Fortunately, hostas are remarkably tolerant of division, and established plants can often be separated successfully with a few basic gardening tools.
The best time to divide hostas is early spring, just as their pointed shoots begin emerging from the ground. Early fall is another option in suitable climates, provided the plants have enough time to establish before winter.
This guide explains when to divide hostas, how to separate large clumps, and what to do afterward to help your new plants grow successfully.
🌱 Why Should You Divide Hostas?
Hostas are clump-forming perennials that gradually become larger as new growing points develop around the plant’s crown.
Over several years, a small hosta may expand into a substantial mound of foliage.
Unlike some perennials that require frequent division to remain healthy, hostas can often grow happily in the same location for many years.
In fact, mature hostas do not necessarily need to be divided at all.
However, division can be beneficial in certain situations.
If a hosta has become too large for its planting area, separating the clump allows you to reduce its size without removing the plant completely.
Some older hostas may also develop less vigorous growth near the center of the clump. Division provides an opportunity to remove unhealthy sections and replant vigorous growth.
Another excellent reason to divide hostas is propagation.
Instead of purchasing additional plants, you can turn one established hosta into several smaller plants for other areas of your garden.
Because division produces plants from the original clump, the new hostas generally retain the same characteristics as the parent plant, including their leaf color and variegation.
This makes division particularly useful for maintaining favorite hosta varieties.
🌸 When Is the Best Time to Divide Hostas?
Early spring is generally the ideal time to divide hostas.
As temperatures begin to warm, hostas emerge from winter dormancy and produce pointed shoots from their crowns.
These tightly folded shoots are sometimes called eyes, points, or noses.
At this stage, the plant has not yet developed its full leaves, making the crown easier to see and the root system easier to handle.
Spring division also gives new plants the entire growing season to establish strong roots before winter.
Depending on your climate, the best time may fall anywhere from March through May.
In warmer regions, hostas may begin emerging earlier, while gardeners in colder climates may need to wait until late April or May.
Rather than choosing a fixed date, watch for the first shoots appearing above the soil.
Ideally, divide hostas when these shoots are visible but before the leaves have fully unfolded.
Can You Divide Hostas in Fall?
Yes. Early fall can also be a suitable time to divide hostas, particularly in areas with relatively mild autumn weather.
After summer’s heat has passed, cooler temperatures can reduce transplant stress.
However, fall division needs to be completed early enough for the roots to become established before the ground freezes.
As a general guideline, aim to finish division approximately four to six weeks before the soil normally freezes.
In colder climates, late summer or early September may be safer than waiting until October.
Gardeners in warmer regions may have a longer window.
If winter weather is approaching and your hostas are healthy, postponing division until spring is usually the better option.
Can You Divide Hostas in Summer?
Hostas can sometimes be divided during summer, but it is not the preferred season.
By midsummer, the plants have developed substantial foliage that requires regular moisture.
Disturbing their roots during hot weather can result in wilting, damaged leaves, and slower recovery.
If summer division is unavoidable, choose a cool, cloudy period and keep the roots from drying out.
Larger divisions with generous root systems generally recover more easily than very small sections.
For the least disruption, early spring remains the best choice.
🔍 How to Tell if Your Hostas Need Dividing
Hostas do not need to be divided simply because they have reached a certain age.
A healthy plant may remain attractive and productive for many years without being disturbed.
However, several signs suggest division might be useful.
One of the most obvious is overcrowding.
If your hosta has expanded into neighboring plants or outgrown its designated garden space, reducing the clump can restore a more balanced appearance.
Another possible sign is declining growth in the center of an older plant.
Some mature clumps develop dead or less productive areas surrounded by vigorous outer growth.
Dividing the hosta allows you to remove the unproductive center and replant healthy sections.
You might also decide to divide a hosta simply because you want more plants.
This is especially convenient when creating a new shade garden or filling spaces beneath trees.
However, if your hosta is growing poorly because of excessive sunlight, drought, pests, or disease, division may not solve the problem.
Investigate the growing conditions first.
🧰 What Tools Do You Need to Divide Hostas?
Dividing hostas does not require specialized equipment.
Most gardeners can complete the job using ordinary gardening tools.
You will need:
- A sturdy garden spade or digging fork
- A sharp garden knife or clean pruning saw for dense clumps
- Gardening gloves
- A watering can or garden hose
- A clean bucket or tarp for holding divisions
- Compost or other suitable soil amendments, if needed
- Organic mulch
For small hostas, your hands may be enough to separate naturally formed sections.
Larger, established plants often have dense, intertwined root systems that require a sharp spade or knife.
Clean your cutting tools before use and between plants to reduce the risk of spreading disease.
Choose a cool, cloudy day whenever possible.
If the soil is dry, water the plant thoroughly the day before dividing it. Slightly moist soil makes digging easier and helps protect the roots.
🪴 How to Divide Hostas Step by Step
The basic process involves lifting the hosta, separating its root clump into smaller sections, and replanting those divisions.
The most important consideration is making sure that every new plant has healthy roots and viable growing points.
Step 1: Prepare the New Planting Location
Before digging up your hosta, decide where the new divisions will grow.
Hostas generally prefer partial to full shade, although sunlight tolerance varies between varieties.
Blue-leaved hostas often need more shade to maintain their distinctive coloring, while some gold-leaved varieties develop their best color with a little morning sun.
Avoid planting hostas in excessively hot, dry locations.
Choose soil that retains moisture while draining well.
Loosen the soil in the new planting area and remove weeds or competing roots where practical.
If the soil is particularly poor, incorporate suitable organic matter.
Preparing the location ahead of time means the divisions can be replanted promptly instead of sitting with exposed roots.
Step 2: Dig Around the Hosta
Use a garden spade or digging fork to loosen the soil around the outside of the plant.
Begin several inches beyond the visible crown to avoid cutting directly through the main root system.
Large hostas may have roots extending considerably beyond the center of the clump, so allow extra space when digging.
Work gradually around the plant, loosening the soil from different sides.
Once the root ball is sufficiently free, carefully lift the entire clump from the ground.
Avoid pulling the plant upward by its leaves or stems.
This can damage the crown or separate shoots from their roots.
Very large hostas can be surprisingly heavy, especially when the soil is moist.
If necessary, use a sturdy spade or ask someone to help lift the clump.
Step 3: Examine the Root Clump
Place the hosta on a clean tarp or other suitable working surface.
Gently remove loose soil so you can see the crown and roots more clearly.
You do not need to wash away every bit of soil, but exposing the growing points can make division easier.
Look for natural separations between groups of shoots.
Each cluster should have a portion of the crown and its own healthy roots.
If the center of the plant contains obviously dead or decayed material, remove those sections rather than replanting them.
Healthy hosta roots are generally firm and fleshy.
Avoid unnecessarily trimming healthy roots, as they help the new divisions establish.
Step 4: Separate the Hosta Into Divisions
Once you can identify the growing points, begin separating the clump.
Smaller hostas may come apart with gentle pressure from your hands.
For larger plants, use a sharp knife or spade to cut through the crown and root system.
Try to follow natural divisions whenever possible.
For reliable establishment, aim to leave approximately two or three healthy growing points, along with a substantial root system, on each new section.
Larger divisions containing several shoots often fill out more quickly than tiny divisions.
It is possible to create smaller sections, but they may require additional time to develop into attractive, mature plants.
Avoid cutting the crown into numerous tiny pieces simply to produce the maximum number of hostas.
A few strong divisions are usually more useful than many weak ones.
Step 5: Replant the Divided Hostas
Once the sections have been separated, replant them as soon as possible.
Dig a planting hole wide enough to accommodate the roots without forcing them into a tight bundle.
Position the hosta so its crown sits at approximately the same soil level as before.
The crown is the area where the shoots emerge from the roots.
Avoid burying the crown too deeply, as this can interfere with healthy growth.
Likewise, do not leave the root system exposed above the soil.
Spread the roots gently where possible and refill the planting hole with soil.
Firm the soil lightly to eliminate large air pockets without compacting it excessively.
When planting multiple divisions, allow enough room for each variety to reach its mature size.
Miniature hostas need much less space than giant varieties.
Step 6: Water Thoroughly
After planting, water each division thoroughly.
This helps settle the soil around the roots and provides moisture for recovery.
Continue monitoring soil moisture over the following weeks.
Newly divided hostas have smaller or disturbed root systems and may dry out more quickly than well-established plants.
Keep the soil consistently moist while the divisions establish, but avoid allowing it to become waterlogged.
Hostas prefer moisture-retentive soil with good drainage rather than permanently saturated conditions.
Step 7: Add Mulch and Allow the Plants to Recover
Apply a layer of organic mulch around the newly planted hostas.
Shredded leaves, pine bark, and other suitable organic materials can help conserve soil moisture and moderate soil temperature.
Keep mulch from piling directly against the crowns.
After division, hostas may temporarily grow more slowly or produce smaller leaves.
This is normal.
Avoid repeatedly digging them up to check their roots.
Give the plants time to develop new growth and establish themselves in their new locations.
🌿 How to Divide a Large, Overgrown Hosta
Large hostas can be more challenging to divide because their root systems become dense and tightly intertwined.
Some established clumps are too heavy to lift comfortably.
If you have a particularly large hosta, you do not necessarily have to remove the entire plant.
Instead, you can use a sharp spade to cut through an outer section of the crown while leaving the remainder in the ground.
Choose a section containing several healthy shoots.
Insert the spade vertically into the clump to separate the selected portion.
Then dig around the outer edge of that section, cutting deeply enough to preserve a substantial portion of the roots.
Lift the separated piece carefully.
The original hosta can remain in place, although its newly exposed roots should be covered with soil and watered thoroughly.
The removed section can be divided further or replanted as a single large division.
This approach is useful when you want to reduce the size of a mature hosta without disturbing the entire clump.
However, it still causes some root damage, so the plant will need appropriate moisture afterward.
If the hosta has developed a dead center, lifting the entire clump may be preferable because it allows you to remove the unhealthy material more thoroughly.
🌱 Can You Divide Hostas Without Digging Them Up?
Yes, hostas can sometimes be divided while the main plant remains in the ground.
This method works best for large, established clumps with clearly visible groups of shoots.
Use a sharp spade to separate a section from the outer edge of the hosta.
Make sure the section contains healthy shoots and enough roots to survive independently.
Carefully dig out the separated portion while leaving the rest of the plant in place.
Refill any gaps around the remaining hosta with suitable soil and water thoroughly.
This method can reduce the amount of digging required, but it is not ideal for every situation.
Small hostas may be easier to lift completely.
Likewise, if you need to inspect the entire root system or remove a dead center, lifting the whole plant is generally more effective.
🌸 How Many Divisions Can You Get From One Hosta?
The number of new plants depends on the size, age, and growth habit of the original hosta.
A small clump might produce only two healthy divisions.
A large, mature plant may produce four, six, or even more sections, depending on how many growing points it contains.
However, the goal should not necessarily be to create as many plants as possible.
Each division needs enough roots and crown tissue to establish successfully.
Larger divisions generally produce a fuller appearance more quickly.
If you want an immediate landscape effect, divide the hosta into two or three substantial sections.
If you are propagating plants for future use and do not mind waiting for them to mature, smaller divisions may be suitable.
Remember that hostas grow at different rates.
Some vigorous varieties increase in size relatively quickly, while miniature, slow-growing, or particularly large cultivars may take longer to reach their mature dimensions.
💧 How to Care for Hostas After Dividing
After division, hostas need time to rebuild and expand their root systems.
Consistent watering is the most important part of early aftercare.
Check the soil regularly, especially during dry weather.
New divisions may require more frequent watering than established hostas because their reduced root systems cannot draw moisture from as large an area.
However, avoid keeping the soil constantly saturated.
Well-drained, evenly moist soil provides better growing conditions.
Also pay attention to sunlight exposure.
Hostas that receive excessive afternoon sun may develop scorched or brown leaf edges, particularly while recovering from division.
If possible, place new divisions where they receive filtered shade or gentle morning sunlight.
Mulch can help moderate soil moisture and temperature, but it should not be piled over the crown.
There is usually no need to apply large amounts of fertilizer immediately after dividing.
In reasonably fertile soil, hostas can establish without aggressive feeding.
If the soil is deficient in nutrients, appropriate fertilizer may be applied according to soil-test recommendations or product directions.
Most importantly, allow the plants time to recover naturally.
🍂 How to Protect Fall-Divided Hostas From Winter
Hostas are hardy perennials, but newly divided plants may be more vulnerable to winter conditions because their roots have not fully established.
The greatest concern in colder regions is often repeated freezing and thawing of the soil.
These temperature changes can cause frost heaving, which pushes newly planted crowns upward and exposes roots.
To reduce this risk, complete fall division well before the ground freezes.
Continue watering as needed while the soil remains unfrozen.
Once the plants have entered dormancy and the ground begins to freeze, a suitable layer of organic mulch can help moderate temperature fluctuations.
Pine needles, shredded leaves, or straw may be useful.
Avoid piling wet mulch directly against the crowns.
If fall arrives too late for reliable establishment, consider leaving the original hosta undisturbed until spring.
For additional seasonal advice, see our How to Prepare a Garden for Winter.
⚠️ Common Mistakes to Avoid When Dividing Hostas
Hostas are forgiving plants, but a few common mistakes can slow their recovery.
Dividing During Extreme Heat
Hot, dry weather increases moisture loss and can cause newly divided plants to wilt.
Choose spring or a cooler period of late summer or early fall whenever possible.
Making the Divisions Too Small
Very small divisions with limited root systems may struggle to establish quickly.
Leave several growing points and generous roots on each section when possible.
Planting the Crown Too Deeply
Hostas should generally be replanted at approximately their original depth.
Burying the crown beneath excessive soil can interfere with healthy growth.
Allowing Roots to Dry Out
Exposed hosta roots can lose moisture during division.
Keep the roots shaded and moist, and replant the sections promptly.
Forgetting About Mature Plant Size
A newly divided hosta may appear small, but some cultivars eventually spread several feet wide.
Give each plant enough space to mature without immediately crowding neighboring plants.
Dividing Diseased Plants
Do not propagate hostas that appear to have serious disease problems.
Hosta virus X, for example, can cause unusual leaf discoloration and distortion and may spread through contaminated tools and plant material.
Suspected infected hostas should be evaluated rather than divided and shared.
Clean and disinfect cutting tools between plants, particularly when disease is a concern.
⏰ How Often Should You Divide Hostas?
Hostas generally do not need frequent division.
Many can remain healthy and attractive in the same location for five to ten years or considerably longer.
Some gardeners divide large clumps every few years to control their size or produce additional plants.
Others prefer to let hostas mature naturally.
Larger established hostas can develop impressive foliage displays that take several years to achieve.
Frequent division may prevent them from reaching their full ornamental potential.
The best approach is to divide a hosta when there is a specific reason.
If the plant has outgrown its space, developed an unhealthy center, or can provide divisions for another garden bed, dividing it may be worthwhile.
If it is growing vigorously and looks beautiful, there is no need to disturb it.
🌷 Will Hostas Grow Back After Being Divided?
Yes. Healthy hosta divisions usually establish successfully when they have adequate roots and growing points.
However, they may not immediately look as full as the original plant.
A division made in early spring may produce normal foliage during the same growing season, but its overall size may be smaller.
Some divisions produce fewer leaves or smaller leaves while their root systems recover.
Depending on the variety and size of the division, it may take one or more growing seasons to develop into a substantial clump.
Larger divisions usually regain a mature appearance more quickly than very small ones.
Be patient and maintain suitable growing conditions.
As long as the crown remains healthy and the plant develops new growth, temporary reductions in size are generally nothing to worry about.
❓ Frequently Asked Questions
Can You Divide Hostas in October?
October division may be possible in mild climates where the soil remains warm and freezing weather is still several weeks away. However, it is often too late in colder regions. Early spring is generally the safer option when there is insufficient time for fall root establishment.
Should You Cut Back Hostas Before Dividing Them?
Not necessarily. When dividing hostas in early spring, their leaves have barely emerged, so cutting back is usually unnecessary. If you divide a fully leafed-out hosta later in the season, removing some damaged foliage may reduce moisture stress, but avoid stripping away healthy leaves without a reason.
Can You Divide Hostas While They Are Blooming?
It is possible, but not ideal. Dividing during flowering may interrupt blooming and place additional stress on the plant. Early spring, before the leaves have fully developed, is preferable.
Can You Cut a Hosta in Half With a Shovel?
Yes. Large hosta clumps can be separated with a sharp garden spade. Make sure each half contains healthy growing points and an adequate root system. Clean the tool before use and avoid unnecessarily damaging the crown.
How Deep Should You Plant Divided Hostas?
Replant hosta divisions at approximately the same depth they were growing previously. The crown should sit near the soil surface, with the roots properly covered. Avoid burying the crown too deeply or leaving roots exposed.
Can You Divide Hostas Every Year?
Hostas can sometimes tolerate frequent division, but annual division is usually unnecessary. Repeatedly disturbing the roots can limit the development of large, mature clumps. Divide plants when needed rather than automatically every year.
Why Is My Hosta Wilting After Division?
Wilting may occur because the roots have been disturbed and cannot immediately absorb enough water to support the foliage. Check soil moisture and protect the plant from excessive sun. Mild temporary wilting can occur, but persistent decline may indicate root damage, poor drainage, or another growing problem.
Do You Need to Fertilize Hostas After Dividing?
Not automatically. Healthy hostas planted in reasonably fertile soil often establish without additional fertilizer. Consistent moisture and appropriate light are more important immediately after division. If fertilization is needed, apply a suitable product according to soil conditions and label directions.
🌿 Final Thoughts
Dividing hostas is one of the easiest ways to multiply your favorite shade-loving perennials while keeping established garden beds attractive and manageable.
The best time is early spring, when the first pointed shoots begin emerging from the soil.
At this stage, the plants are easier to handle and have an entire growing season to recover.
The process is straightforward: carefully lift the root clump, separate it into healthy sections, and replant each division at the proper depth.
Keep the new plants watered while they establish and avoid exposing them to unnecessary heat or drought stress.
Remember that hostas do not need to be divided regularly to remain healthy.
If your plants are growing beautifully, you can simply enjoy them.
But when a hosta becomes overcrowded or you want to create additional plants, division provides a practical and inexpensive way to expand your garden.
With a little care and patience, one established hosta can become several beautiful plants that continue bringing color and texture to shady spaces for years to come.
🔗 Related Articles
- Fall Gardening Checklist
- When Should You Cut Back Perennials? Fall vs. Spring Pruning Guide
- How to Prepare a Garden for Winter
- How to Protect Plants From Frost