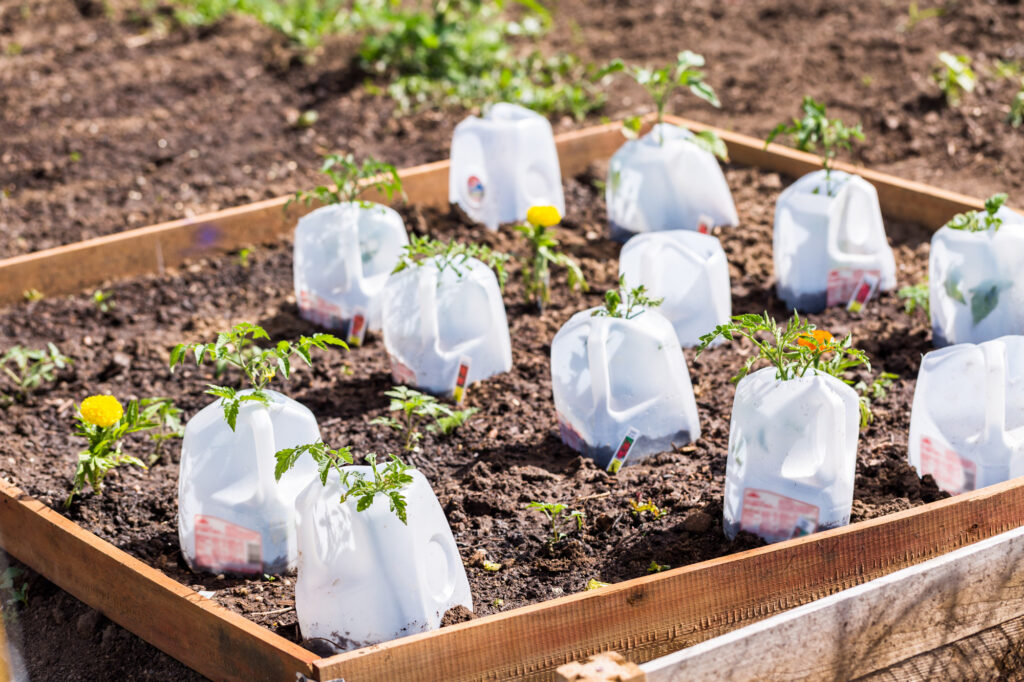
Starting seeds does not always require grow lights, heat mats, or a spare room filled with trays. Winter sowing lets you begin outdoors during the cold season, using simple containers that protect seeds while exposing them to the weather. A recycled milk jug, suitable growing mix, and a packet of carefully chosen seeds can be enough to get started.
The method is especially useful for many native wildflowers and other plants adapted to cold winters. It can also work for selected annual flowers and cool-season vegetables when they are sown at the right time. Success depends on matching the seed to your climate and understanding what the container can—and cannot—do.
🌱 What Is Winter Sowing?
Winter sowing is a seed-starting method in which seeds are planted in vented containers and placed outdoors during winter to germinate when conditions become suitable. Clear or translucent containers act as small, unheated greenhouses, helping retain moisture and sheltering seeds from some disturbance.
The seeds may remain dormant for weeks before anything appears above the growing mix. As temperatures change and the seeds’ germination requirements are met, seedlings begin to emerge. Different species respond at different times, so containers planted on the same day may sprout weeks apart.
Winter sowing differs from growing vegetables through winter or planting an established winter garden. Its main purpose is to produce seedlings for later transplanting. Some gardeners also sow seeds directly into outdoor beds in fall or winter; containers make it easier to label seedlings, monitor them, and decide where to plant them afterward.
❄️ How Does Winter Sowing Work?
Many plants from temperate climates have seeds with dormancy mechanisms that delay germination. For some species, an extended period of cold, moist conditions helps break that dormancy. This treatment is called cold moist stratification, and outdoor winter weather can provide it naturally.
The moisture matters. Keeping a dry seed packet in a cold garage does not necessarily provide the same treatment as placing seeds in moist growing mix. Requirements also vary: some seeds need several weeks of chilling, others need longer or more complicated treatment, and many need no cold treatment at all. Repeated freezing is not a universal requirement; refrigerator temperatures can satisfy the chilling needs of many species.
The container provides a sheltered growing environment, but it does not supply heat overnight. Winter sowing does not make a tender plant frostproof. A seed’s ability to wait through cold weather and a seedling’s ability to survive freezing are separate considerations.
📅 When Should You Start Winter Sowing?
Choose your starting time according to the species, its treatment requirements, and your local winter. Across many colder parts of the United States, December through February is a practical window for seeds that need a prolonged cold, moist period. Some species benefit from an earlier start, while seeds with shorter chilling requirements may still succeed when sown later.
Hardy annuals and cool-season vegetables are generally started closer to spring. Kale, lettuce, or snapdragons do not all need to spend the entire winter outside, and a plant’s cold tolerance does not mean its seeds germinate well in very cold soil. Follow the seed supplier’s instructions and local extension guidance when choosing a date.
In mild-winter areas, outdoor conditions may not provide enough chilling for certain species. A recommended refrigerator treatment can be more dependable for those seeds. Conversely, sowing a species too late in a cold climate may leave insufficient time for its required treatment before spring warmth arrives. The winter solstice is a popular starting tradition, but it is not a deadline.
🌼 Which Seeds Are Good for Winter Sowing?
For a first attempt, look for seeds described as requiring cold moist stratification, suitable for fall sowing, self-sowing, or tolerant of cool conditions. These descriptions are useful clues, although the instructions for the exact species should guide your decision.
Native flowers commonly grown this way include purple coneflower, swamp milkweed, wild bergamot, black-eyed Susan, and prairie blazing star. Choose species suited to your region and the conditions in their eventual planting site. Their germination requirements differ, so avoid assuming that every native flower needs the same treatment.
Snapdragons and pansies are examples of cool-season flowers to consider. Kale, broccoli, cabbage, and selected lettuce varieties can also be candidates for later outdoor container sowing. Heat-loving crops such as tomatoes, peppers, cucumbers, and basil are less straightforward choices for a beginner’s midwinter project. They need suitable warmth to germinate and grow, and prolonged cold, wet conditions can cause problems. Indoor starting or later sowing is often a better fit for them.
🧰 What You Need to Get Started
You can begin with a few containers and ordinary seed-starting supplies:
- Clean, clear or translucent milk jugs, water jugs, or other suitable containers.
- A well-drained, soilless seed-starting mix or fine-textured potting mix suitable for seedlings.
- Seeds with known germination requirements.
- Scissors or another appropriate cutting tool, plus a tool for making drainage holes.
- Weather-resistant tape, durable plant labels, and a pencil or suitable marker.
- Water and a container for moistening the growing mix.
Choose containers with enough depth for roots and enough space above the mix for seedlings. Gallon jugs are convenient because they can hold several inches of mix beneath a roomy cover. Shallow food containers can dry out faster and give seedlings less growing space.
✂️ How to Winter Sow Seeds in Milk Jugs
1. Clean and prepare the jug
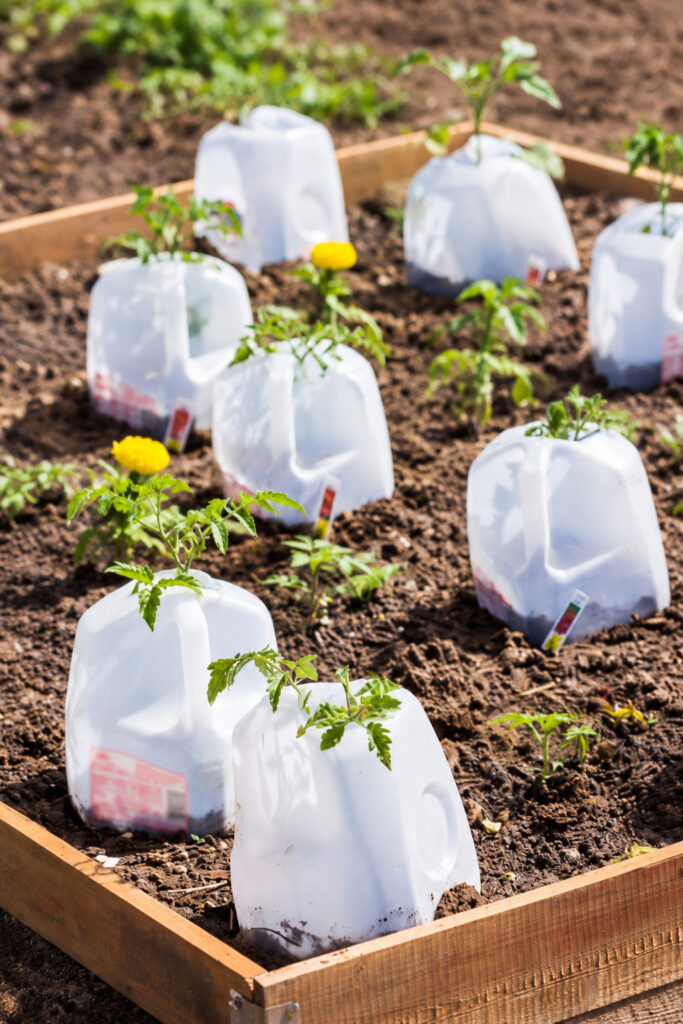
Wash the jug with warm, soapy water and rinse thoroughly. Carefully cut around it above the section that will hold the growing mix, leaving a connection near the handle to form a hinge. This lets you lift the top for planting and close it again afterward. Work on a stable surface and take care with sharp tools and cut plastic edges.
Make several drainage holes in the bottom so excess water can escape. Remove the screw cap and leave it off. The opening provides ventilation and lets precipitation enter; the jug should not become an airtight chamber. Containers with solid lids need openings in the top as well as drainage below.
2. Add moist growing mix
Moisten the mix before filling the jug, aiming for evenly damp material without standing water. Add roughly 3 to 4 inches, allowing enough headroom for seedlings beneath the cover. Settle it gently without packing it tightly.
Avoid using soil dug from the garden. A suitable soilless mix offers more predictable drainage and is easier for small roots to grow through. Water should move through the container and drain away, leaving the mix moist rather than saturated.
3. Sow at the recommended depth
Follow the packet’s sowing instructions. Some seeds need a covering of mix, while others require light and should be pressed onto the surface. Tiny seeds should not automatically receive the same covering as larger seeds.
Use one species or variety per container and leave room for seedlings to develop. This makes identification, thinning, and transplanting easier, especially when plants germinate at different rates. You do not need to empty an entire packet into one jug.
4. Label and close the container
Record the plant’s name and sowing date on a durable label inside the jug, and label the outside as well. Outdoor light and weather can fade some permanent markers, so a second label helps preserve identification.
Close the hinged top and secure the cut seam with weather-resistant tape. Keep the neck opening unobstructed. The goal is a stable, ventilated enclosure that shelters the seeds while allowing air and moisture to move through.
5. Place the jug outdoors
Choose a bright location protected from strong winds, with access to rain or snow. Keep containers away from roof runoff and places where water collects. An open crate can help keep jugs upright, provided water can drain freely.
Avoid placing them beneath a roof and assuming precipitation will keep them watered. Also consider how sunny the spot becomes in spring: a location that works during cold weather may become too hot for enclosed seedlings as days lengthen.
💧 Caring for Containers Through Winter and Spring
Check containers periodically during winter, particularly during dry or mild spells. Rain and melting snow may supply much of their water, but they do not guarantee that the growing mix stays moist. Inspect the mix when it is thawed and water gently if necessary, taking care not to wash small seeds out of place. Condensation can be a useful clue, but it does not replace checking moisture.
Once seedlings emerge, monitor more frequently. Sunshine can heat a jug quickly even when outdoor air feels cool. Open the top or increase ventilation as needed, and gradually leave containers open for longer periods as conditions allow. Watch for drying mix, wilted leaves, and excessive wetness.
Keep track of overnight forecasts as well as daytime warmth. A jug offers limited protection from freezing. If an unusually cold spell threatens emerged seedlings, provide protection appropriate to the species; do not assume replacing the lid will be enough.
🌿 When Can You Transplant Winter-Sown Seedlings?
Look for seedlings with established roots and true leaves—the leaves that develop after the initial seed leaves. For many plants, one or two sets of true leaves indicate that they may be ready for careful handling. Size alone is less useful because species grow at different rates.
Gradually exposing seedlings to open-air conditions helps them adjust to stronger wind, sun, and changing moisture levels. Although outdoor-grown seedlings have already experienced temperature fluctuations, their enclosure still provides shelter. Allow a transition period before moving them into an exposed garden bed.
Transplant when the soil is workable and the weather suits the plant. Cold-tolerant species may be planted before the last expected frost, while tender plants need warmer conditions. Water before separating seedlings, lift roots gently, and plant at an appropriate depth. If plants are crowded but conditions are unsuitable for planting out, move them into individual pots and continue caring for them.
⚠️ Common Winter Sowing Mistakes
Poor drainage, overcrowding, and inadequate ventilation can turn a promising container into a difficult growing environment. Check drainage before sowing, give seedlings room, and respond when warmer weather changes conditions inside the jug. Winter sowing reduces the need for indoor equipment, but it still requires attention.
Another common mistake is treating every seed the same way. A milkweed species needing weeks of chilling and a warm-season vegetable have different requirements. Keep the seed packet or record its instructions so you can judge progress against the plant’s needs.
Finally, avoid discarding a container simply because another has already sprouted. Native seeds can germinate unevenly, and some take months or longer. Check expected timing, moisture, sowing depth, and treatment requirements before deciding that a batch has failed.
🪴 A Simple First Winter-Sowing Project
Start with a few labeled containers and a small selection of plants suited to your garden. Choose one locally appropriate native flower with clear germination instructions, then try a cool-season flower or vegetable at its recommended later sowing time. Keep a short record of planting dates, first sprouts, and any changes you make to ventilation or watering.
Your first season will show how your chosen location responds to winter weather and spring sunshine. Those observations make future sowings easier to plan, whether you want a few flowers for a border, plants for pollinators, or vegetable seedlings for an early-season garden.
🔗 Related Articles
- Winter Gardening Checklist: Essential Tasks to Prepare for Spring
- Black-Eyed Susan Care
- Butterfly Weed Care
- Columbine Care
- Sweet Pea Care: How to Grow Fragrant Sweet Peas From Seed
📚 Sources & Further Reading
- University of Maine Cooperative Extension: Winter Sowing — Maine Home Garden News, February 2026.
- University of Minnesota Extension: Jug It and Grow: Winter Sowing for Pollinator Gardens.
- University of Illinois Extension: Seed Stratification: What Seeds Require Cold Treatment.
- South Dakota State University Extension: Winter Sowing in the Northern Great Plains.
- University of Missouri Extension: Winter Sowing Seeds.
- University of Maryland Extension: Collecting & Sowing Native Plant Seed.
- Kansas State University Research and Extension: Winter Seed Sowing.
- Cornell Cooperative Extension: Winter Sowing 101.
- University of Illinois Extension: How to Try Winter Sowing.
- University of New Hampshire Extension: Starting Plants From Seed.